
Diving In to Recording Interfaces
In the overview article Equipping Your Home Studio, I touched on the subject of recording interfaces. This time, as we did with microphones, we are going to take a deeper trip into this powerful space.
What Is a Recording Interface

There are many recording interfaces in the market. I use those from Universal Audio almost exclusively
At a fundamental level, a recording interface is a device that takes low level microphone levels, and high impedance instrument signals as inputs and passes them to a digital audio workstation software. Back in the older days of digital recording, we worked with devices that could attach to computers but were pretty much self contained. They tended to look like mini mixing desks or recording consoles. They would have a set of inputs, some at the microphone level and some at instrument or line level. They had faders or knobs to control levels and typically added pan controls to determine where the track would sit. Some had effects but in general, while effective, the devices were underpowered and had a high level of latency or delay between the original signal and the monitored signal Units came from Tascam and Zoom and were typically sub one thousand dollars. They were fine for demos and working on songs but not suitable for final mastered content.
Today, instead of solely hardware devices, we combine the hardware of an interface with the software of a digital audio workstation program. The recording interface will have a selection of inputs, both low impedance and high impedance and typically contain preamplifiers to raise the level of microphone signals to a level that can be recorded. They came as small as a single input to as many as 16 inputs concurrently. The higher end units can be chained together for more live inputs if you so desire.
The recording interface’s cost is typically defined by its connectivity options and the included preamps. Thunderbolt interfaces can move more data per second and readily support chaining of devices (presuming of course that the device is set up for this). USB interfaces are still the most common with a high level of variance in choices from basic USB 2 through USB 3 and USB C. USB C has the potential for high bandwidth similar to Thunderbolt but is not built to chain like Thunderbolt is. In general, a USB interface device will cost less to buy than a Thunderbolt interface device, and is likely to be more compatible in general without needing specific drivers. Also most all computers are designed to work with all manner of USB devices, whereas there are Thunderbolt equipped computers whose Thunderbolt systems are incomplete and cannot support full Thunderbolt devices. As an example, I have a very powerful but aging Lenovo P70 workstation with two Thunderbolt 3 ports, but they do not recognize the majority of full Thunderbolt 3 devices. Be sure of what your computer can readily support before investing in an interface only to discover that it does not work.
Recording interfaces can either be powered off the bus (they get power from the connected computer) or use their own power supply. The concept of not having to carry a power supply sounds great for field work, and this is where simple USB interfaces can excel. There are Thunderbolt bus powered devices, but they are rarer and much more particular about the cable and the connection. Many people get confused because USB C connectors look identical to Thunderbolt 3 connectors and so do the cables. Be assured that they are not the same at all. If you are considering a Thunderbolt connecting interface be sure to order a Thunderbolt 3 cable as a separate item. I have not found an interface that includes the cable in the box. I find this to be really cheapskatish and very annoying, but it is what it is.
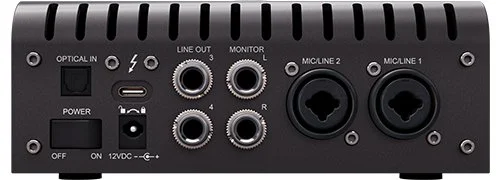
Rear view of the Apollo Twin X. Note the dual use XLR / TRS inputs, the locking power connection, multiple outputs, Thunderbolt III computer connection and Optical Input. The optical input is how I connect my distantly placed UA Ox Box
A small device will often have two microphone inputs with preamps that can double as line inputs selectable by a switch. Line inputs can be either balanced, meaning that they use a TRS (tip ring shield) connection, or unbalanced using a TS connection. Instrument cables are TS connections and have limited run length and are more susceptible to noise as cable length increases. Some modern amplifiers offer a line out to an interface, and I have found that the documentation is pretty crappy in general. If the amplifier that you use as a line out in the form of an XLR connection, it is balanced, and if it uses 1/4” plugs, it will be unbalanced unless the maker is very clear that the output is balanced. Since this idea of line out from amplifier to direct interface is still somewhat new, most of these outputs are unbalanced and you may not like the sound that you get. Others are excellent and the only way that you will know is to try.
Your recording interface is how your music gets into the DAW for recording, mixing and mastering. Don’t cheap out on crap cables. It’s false economy.
Most recording interfaces will have studio monitor outputs to go direct to studio monitor speakers as well as a headphone output. The music signal will go to the DAW via the USB or Thunderbolt cable. Some recording interfaces have a High Z (high impedance) input right on the device, which is a good way to connect your instrument straight to the interface. In this case, you are getting the raw signal from the guitar or bass, and for your final mix to sound decent, you have to plan to do some processing in the DAW so it sounds decent.
Most better recording interfaces will be able to provide +48v Phantom power on the microphone inputs. They may also have a PAD function to reduce really hot input signals and some will include a high pass filter to cut out low frequency boominess. The +48v is essential if you are using condenser microphones and the PAD is useful if you run a guitar with high output active pickups right into the interface. I don’t use the high pass filter on the device myself, and choose to do this in the DAW with more controllable software if I need this function.
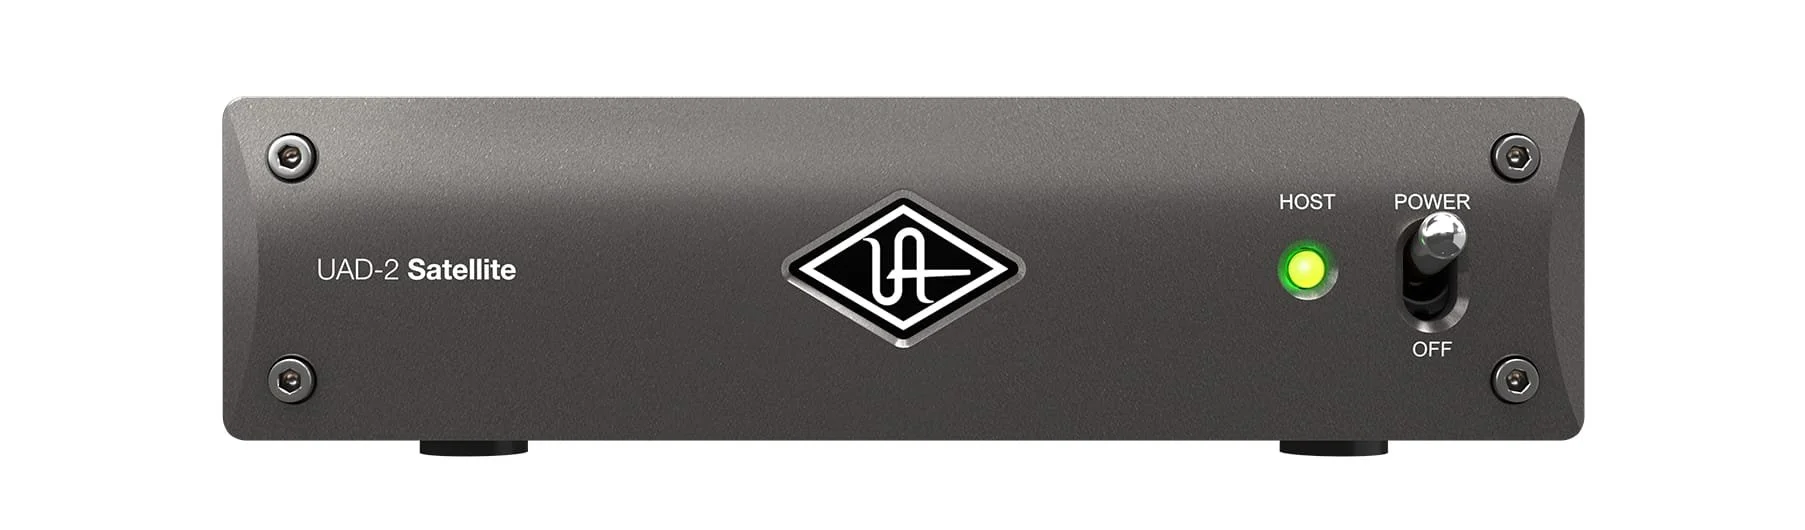
A benefit of outboard processing in the interface is that if you need more CPU, the interface can have more CPU added by an extension device, like this UAD-2 Satellite. It adds eight processing cores to the two already present in a Twin X
Add-On Software - The World of Plug Ins
When you start recording, you will swiftly become flooded with news of plugins. Plugins come in many shapes and sizes and functions. Before we break them down into bite sized categories, let’s deal with how plugins are run. Most plugins run inside the DAW and consume CPU and memory from your computer. At first this sounds really convenient, but you may find that some plugins are very demanding of system resources. Reverbs and delays are the big eaters, but so can be preamp plugins. Some plugins, such as those from Universal Audio are controlled from the DAW but actually run on dedicated DSP chips in the recording interfaces. These interfaces will be purchasable with a choice of DSP cores. More cores cost more money. Many a recordist has thought that two cores would be all they needed for simple home recording and learned very quickly that two is a very small count. Plugins that run on the interface do not create load on the computer itself, so it’s a balancing act. I have found that the UA plugins generally are more exacting and more capable than in computer plugins but that depends on what the plugin does.
Most interfaces come with a basic set of plugins. These are generally useful, but you need to learn how to use the plugin as a separate step from learning the software. Some of this stuff is incredibly powerful and quite complex. However, if you want the sound of the reverb chamber at Capitol Records, without having to go there and rent time, a plugin is the way to go.
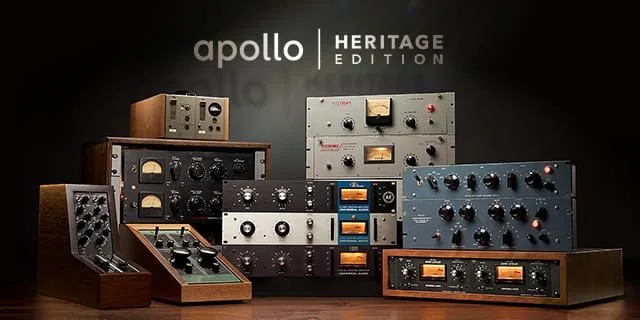
When you choose a UA Apollo Heritage Edition interface, plugin versions of all these classic studio devices are included. It’s well worth the investment
For guitarists and bassists who want the sounds of different amplifiers and to control microphone placement on those virtual amplifiers, that is a family of plugins on its own. Some are great, some not so much, and this category is getting trampled a bit by incredible amplifier profiles and cabinet Impulse Response profiles from interfaces like the Kemper Profiler or the Quad Cortex. I use them both, and have stopped using amplifier plugins in my DAW almost completely.
The more useful plugins are typically not simulation or effects. What you look for here are the kinds of plugins that deliver the sound of classic analog interfaces. An example are the analog preamps used in classic studios. There are a variety of plugins that deliver the tone of an old Neve console. There are also plugins that sound like the SSL4000 systems or the API systems. These plugins are subtle and you have to spend time with them, but once you have invested in yourself, you will be amazed how much a good preamp plugin can do. Some of these plugins are designed to ride directly on the preamps in your recording interface. This is one reason why the Universal Audio UNISON system is so popular with smaller studios and serious recordists.
Other plugins that I use all the time are the digital implementations that deliver the sound of old school compressors and EQ systems. I am, a compressor geek, and have bought too many compressor plugins because I love what they can do for a track or a mix. There are compressors like the UA 1176 family and tube sounding compressors such as those designed to sound like Teletronix units. Again, they are subtle and you need good monitors or headphones to hear them well but man…
Into the DAW
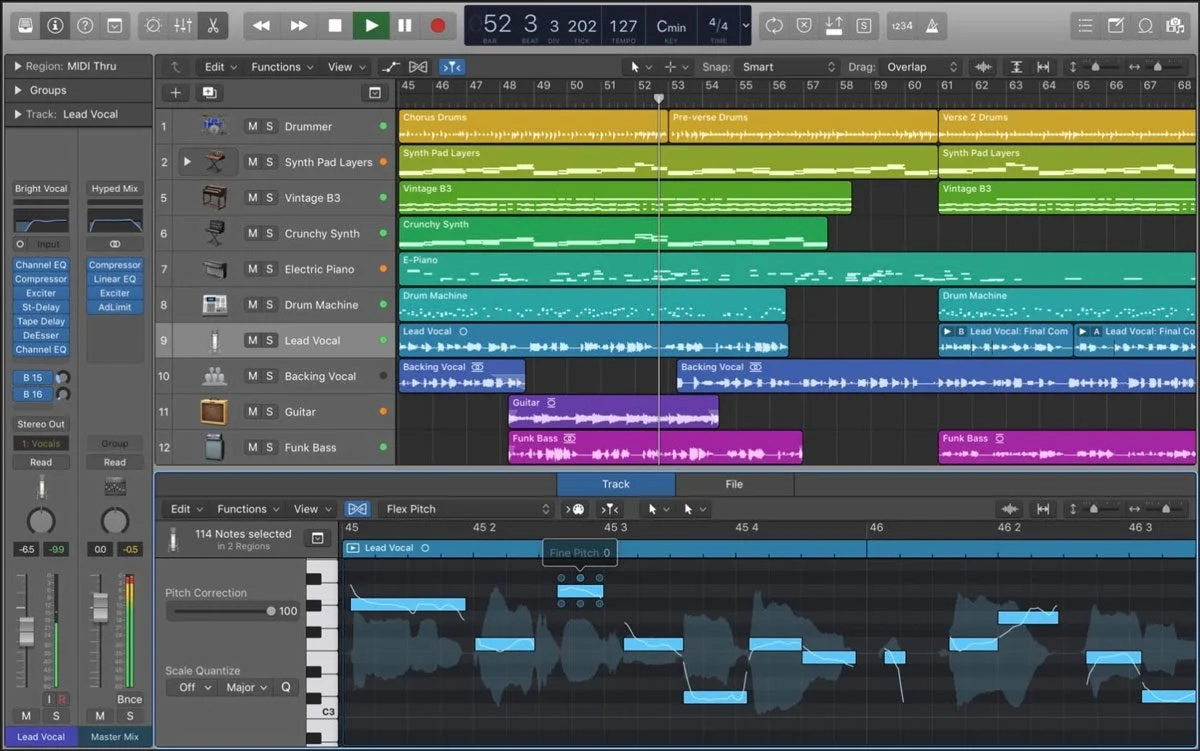
This screen shot from Apple’s Logic Pro gives an idea of the power in today’s computer based DAW software (Digital Audio Workstation). There aremultiple track support, multiple buss support, as well as mixdown and mastering functions. Plugins that add value are easily used and the base product comes with a ton of instruments for creating your own backing tracks as well as some very useful virtual drummers to create backing tracks. There are other options such as Pro Tools, and Ableton Live! and even excellent free DAWs such as Apple’s Garageband.
When the signal from the recording interface goes to the DAW, there are many ways to do so. In the case of Thunderbolt connected devices, the Thunderbolt drivers provide that connection using the MME device class. For USB devices, you can sometimes use the OS default USB connect, but often this has latency and some audio deficiencies, so many folks use the ASIO device class. Since ASIO is implemented so inconsistently, particularly on Windows, many makers of interfaces will recommend ASIO4ALL be installed. It works, but it increases complexity in your setup. However, some devices, like RODE’s RODECaster Pro, a superb tool for podcasters needs ASIO4ALL if you want each input from the RODECaster Pro to be its own track. ASIO introduces some latency, but for the most part, you won’t really notice.
The DAW (which we will dive into in a separate article) is where the audio gets recorded. You map each channel of your interface to a track and go for it. You will set the basic input levels using your recording interface but some of them have meters that are questionable. The DAW has more accurate meters and here is where you will fine tune your input levels for your recordings.
When recording to a DAW, you can apply a plugin that gets laid into the recorded track, or apply the plugin after the track has been recorded. The first works well for live monitoring so you can hear the plugins while you are recording and monitoring through headphones, but if you don’t like the recorded sound, the plugin is already baked in. The second is a more clinical approach. Try them both and pick the manner that you like best.
Because the DAW can have multiple tracks, you can connect different devices to your interface to do individual track recordings that you mix together after the fact. Many individual artists do this, laying down the basic music track, then using it as the basis to record the vocals. Other instruments can be added at different times.
Because recording drums is an artform in itself, many artists will use the DAW’s ability to provide a drum loop as a backing track. This allows the instrumentalist or vocalist to record their parts with the drums already in place. Later tracks from a real drummer can be recorded and the DAW drum loops can be dumped, although there are a lot of songs out there using drum loops from a DAW. The point of this discussion is the importance of low latency if you are listening to tracks whilst recording others. You want to be recording in time with what you are hearing. High latency interfaces, slow computers and reduced capability DAWs can be problematic.
Summary
A recording interface should last you a good long time. It’s been more frustrating recently as computer makers have dumped support for Thunderbolt 1 and Thunderbolt 2 which had different cables. Newer interface units may not be backward compatible with old connection systems. With USB 4 and Thunderbolt 4 coming soon as I write this, the good news is that the cable connectors will not change and the new protocols will be backward compatible so if I get a computer in 18 months that is Thunderbolt 4, all my Thunderbolt 3 recording interfaces will still work. So I am told. This connection jerk around is the biggest frustrator for recordists and one reason why there are still recording interfaces using USB 2. It’s the lowest common denominator. When Apple pulled the plug on FireWire (immediately followed by the rest of the world) hundreds of thousands of dollars of gear became unusable with the new machines. I personally still want to beat someone with a stick for that because FireWire was much faster and much more reliable than USB ever was. Fortunately Thunderbolt is not an Apple specific thing and so should Apple make a dick move with Thunderbolt, most decent Windows machines support it. So when I am buying a recording interface today, I am choosing Thunderbolt 3. I do have a USB-C interface attached to that Lenovo P70 for quick recordings in the living room, but only because the Lenovo’s support for Thunderbolt doesn’t work for shit.
When I think back forty years, the time, the cost and the amount of work to record your own music compared today has no comparison. We may miss the studio experience, as well as the ability to hire brilliant engineers and producers, but for a lot of musicians, without record label funding, and good revenue from recording sales, studio time is pretty darn expensive. Recording on your own is a set of learned skills, but the tools have never made it easier.
Thanks for reading! Next up will be a deeper dive into the Digital Audio Workstation and until then, peace. If you have any questions, send them in here.